Web Export 3.5.0 for Adobe XD and more

It has been one year since Web Export was released and it is now at version 3.5.0. With Web Export you can author and export web pages, web sites, slideshows and more from Adobe XD. It is really at version 1.0.0 in the big picture.

There have been exciting new features, new and smoother workflows and new documentation and videos and a new website and new forums. In the latest version you start out with a basic export screen and you can switch to an advanced screen.

Along with the Web Export plugin came the Alignment plugin and the Statistics plugin.

The Alignment plugin does just what it says. It supports aligning items to their container, stretching items to fit, aligning to margins, aligning to center and more.

Check out the Web Export playlist and start taking your designs online.

Check out the new documentation here.

And for this week only use the code MAX-SPECIAL to get 30% off all Velara 3 software at the store here.

How to create great type art

This tutorial will explain how to create great type compositions and text art using VeraType for Android or VeraType for Win and Mac.

This is part one of a three part series.
Part II – How to convert text into an image
Part III – Sharing your type compositions

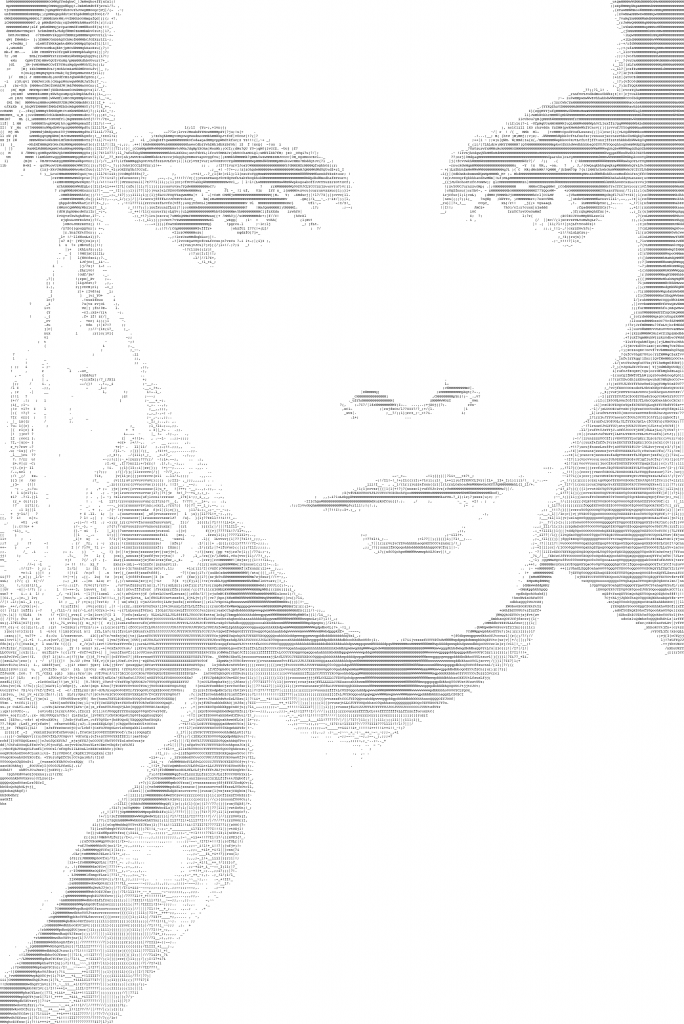
The first image we’ll create is made out of letters of the alphabet (a set of letters, numbers and punctuation known as the ASCII character set).

Here is the first final image.

Click to enlarge

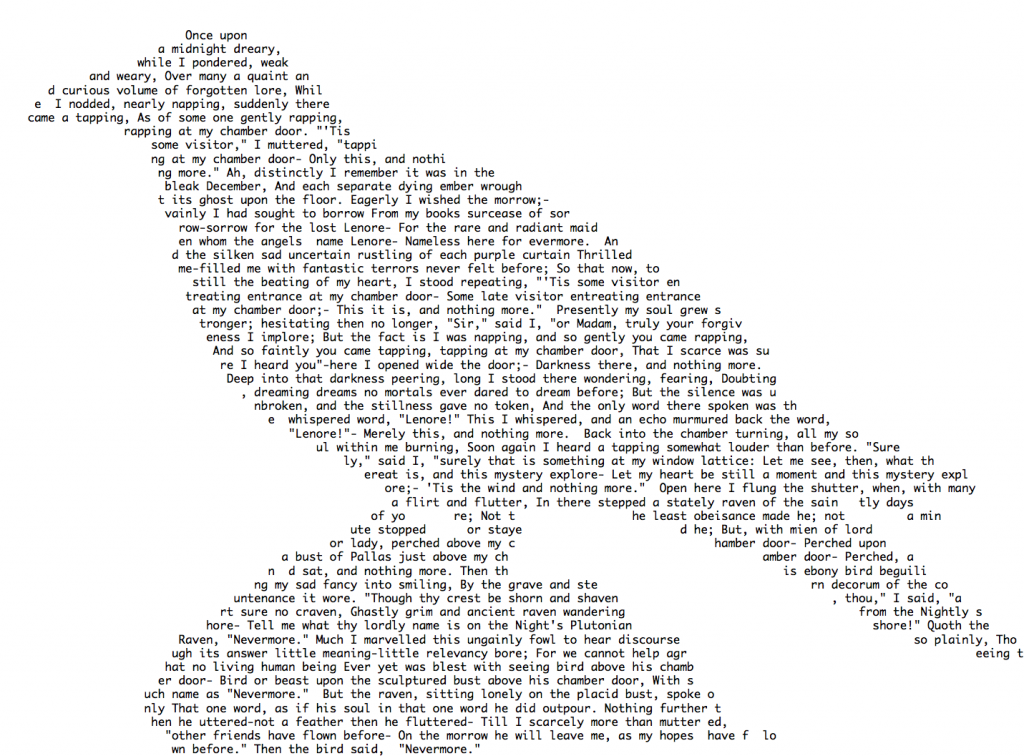
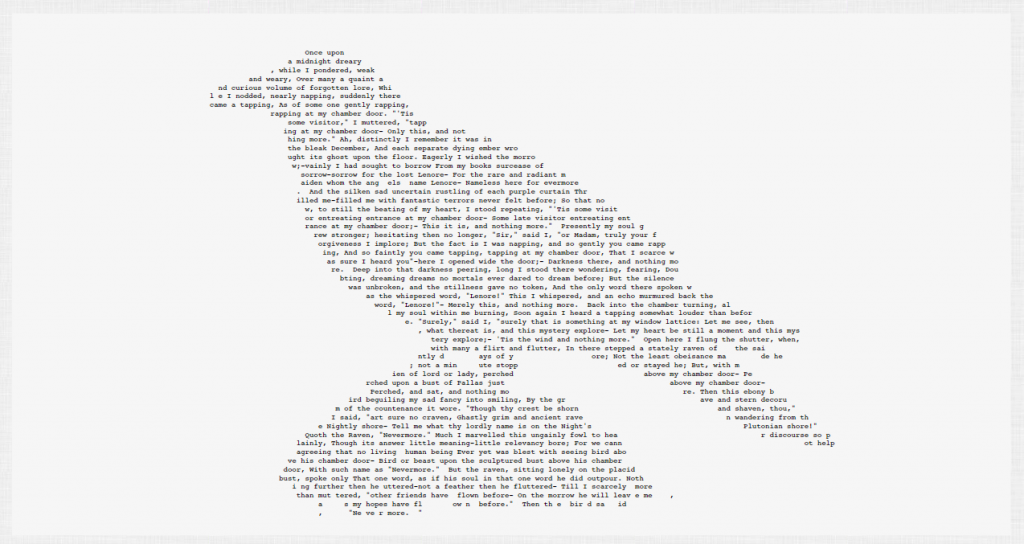
The second image we’ll create is an poem in the form of an image. Here is that final image.

TheRaven

Click to enlarge

Summary

  • Import image
  • Make adjustments
  • Share and Export

Importing the image

To create ASCII art we need to start with an image. On the desktop version we can add an image from our computer. On a mobile device we can add an image from the camera roll or image gallery. If you don’t have any images do a quick search online and save them to your camera roll.

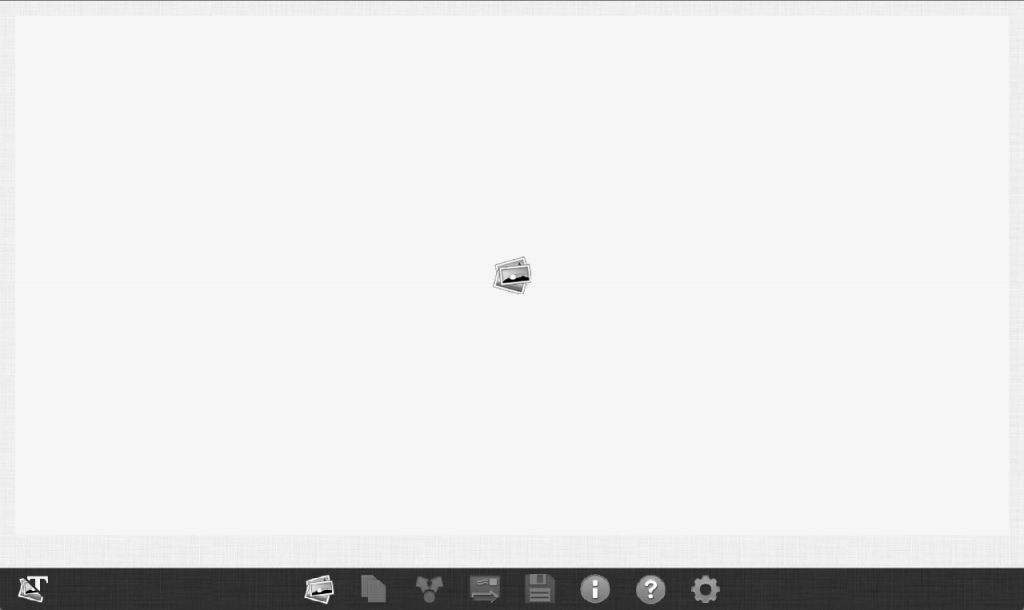
Here is the home screen:
Home

Image GalleryTo select an image click on the image gallery button and select the image from your computer or mobile camera roll. Note: You may need to add images to your camera roll to use. Search online for what you’re looking for.

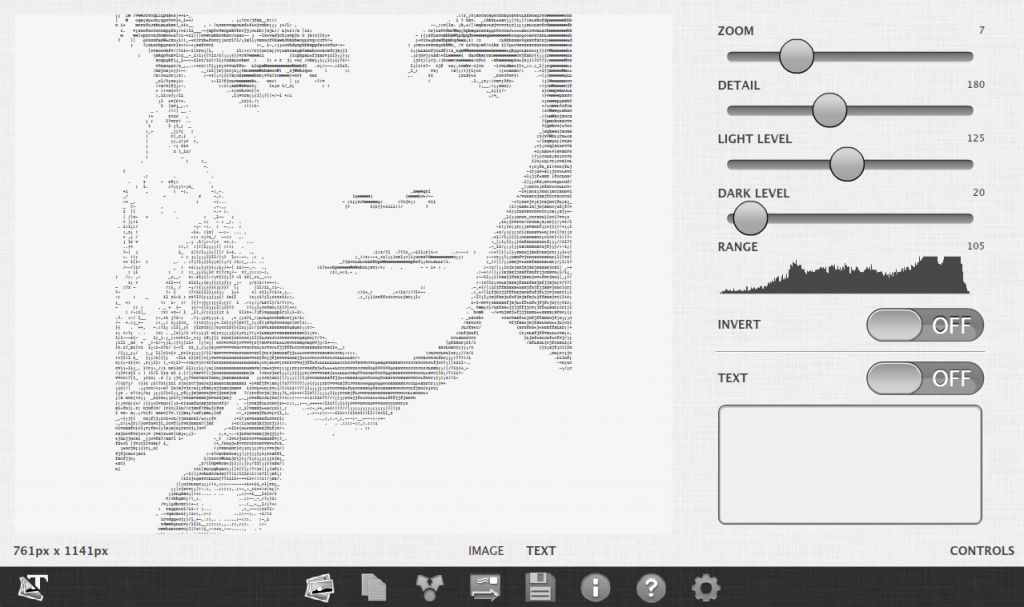
Once you’ve selected an image it can take up to fifteen seconds to convert the image the first time. When it is completed the controls panel will be visible.

Image loaded

Making Adjustments

The first thing you will want to do is make adjustments. I usually increase the dark levels by about ten. This increases the contrast. I then adjust the brightness level up or or down until I get a look I’m looking for.

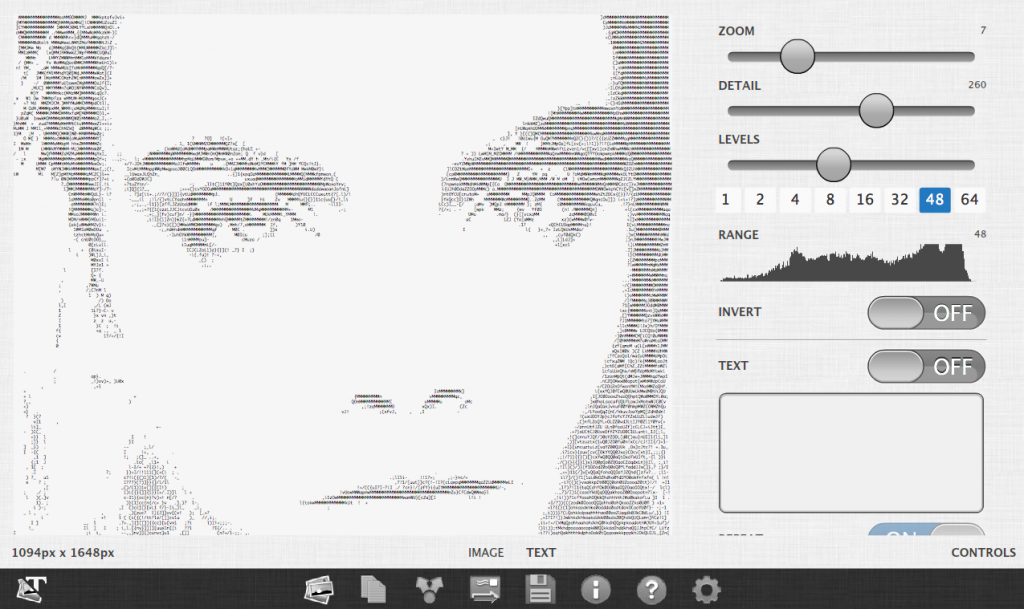
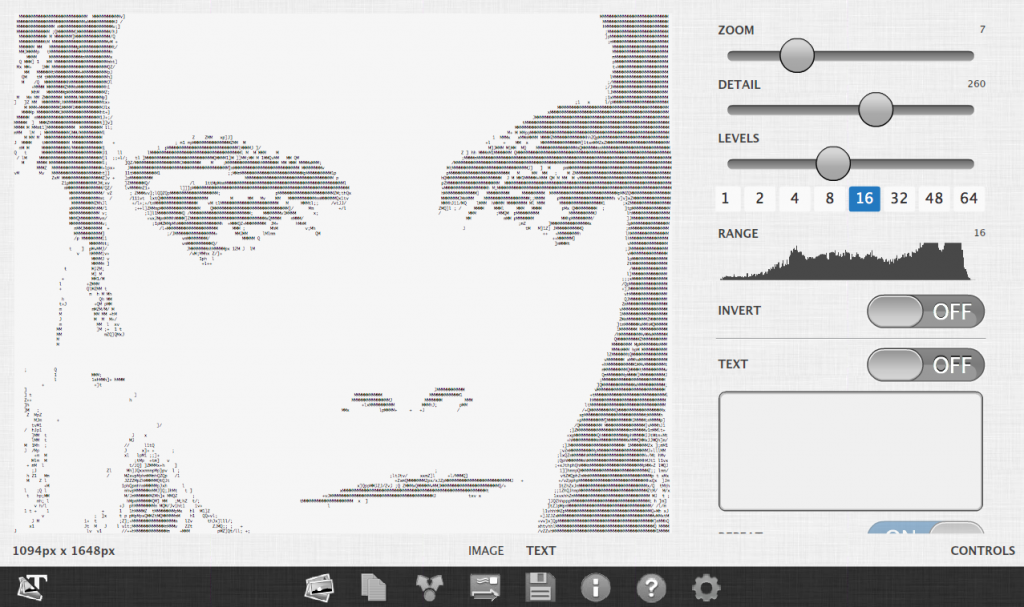
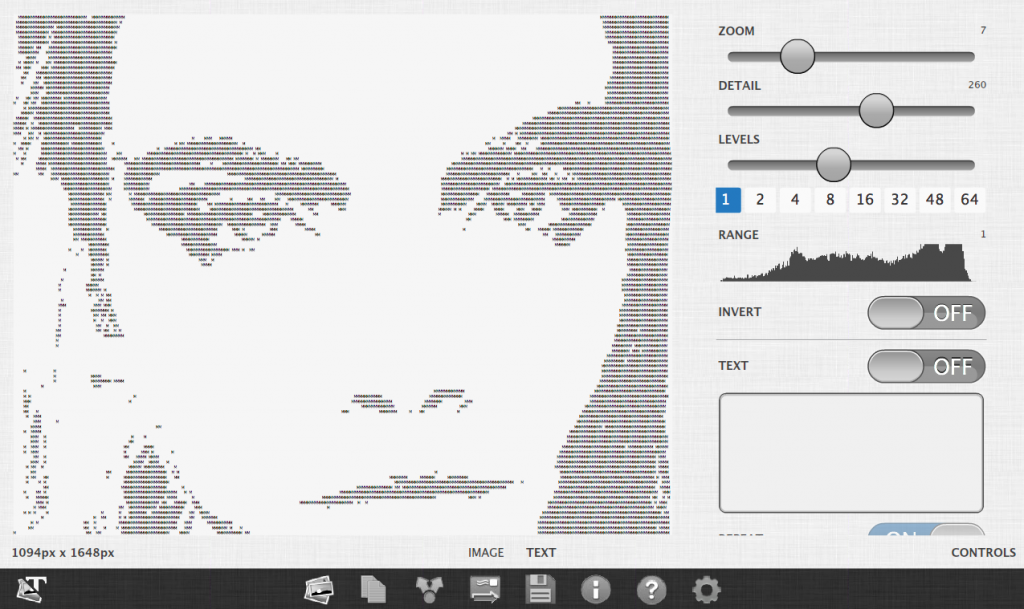
Alternatively, you can use the Levels slider to change the image grayscale range. Go into the settings and enable the switch, “Levels Controls”. The following images show the difference in range at 48, 16, and 1.

Figure 4. At 48 range

Figure 4. At 48 range

Figure 5. At 16 range

Figure 5. At 16 range

Figure 6. At range of 1

Figure 6. At range of 1

Changing the Level value up or down changes the brightness value in the range you selected. This changes the amount of characters in the picture.

Zoom and Detail

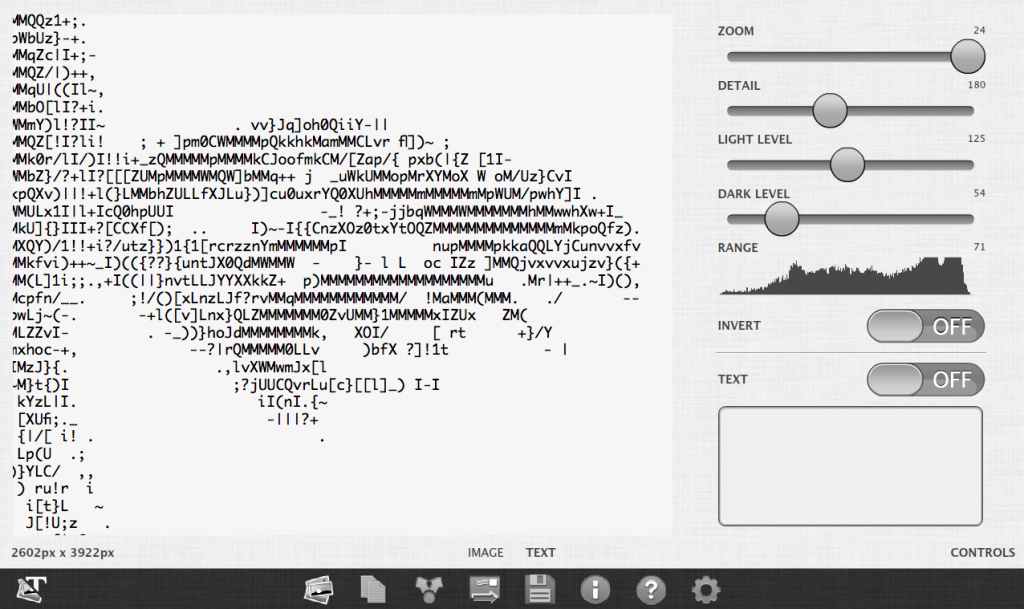
Once the image is loaded you can can zoom in and out using Zoom slider. This allows you to see the letters up close or pull out to see the whole picture.

Figure 4. Letters up close

Letters up close

BTW Font size and zoom are synonymous in this program.

If you are zoomed out too far you will see banding. These appear as thin lines. This means the font size is too small. If you export your image at too small a font the banding will appear in the export. Before you export set the font size to 8 or above. You can change this in the export options. The suggested default font size is 10 to 12.

The amount of detail in the image is adjustable. You can increase the quality by increasing this value. Warning: Be careful not to set this too high on a slow device. When you increase this value the processing time will also increase. If you set the detail level too high it will take a long time to process but you will get a much better quality image. You can keep this value at a medium and increase it before you export or share your work.

Some images do not convert well. Illustrations that contain one or two colors convert well (see Figure 1). Images with strong light and dark areas and strong defined edges work well (see Figure 2). Images that contain no strongly defined edges do not work well (see Figure 3).

Figure 1. Illustration

Figure 1. Illustration. Great conversion

Figure 2. Light and dark

Figure 2. Light and dark. Great conversion.

Figure 3.

Figure 3. Low contrast. Not so great

This is the end of part I. Continue to the next sections to learn how to convert text into an image and how to export and share your work.

PART II – How to convert text into an image
PART III – How to export and share your type compositions

If you like this application please let others know about it.

© All images copyright their respective owners.


How to convert text into an image

This tutorial will explain how to create great type compositions and text art using VeraType for Android or VeraType for Mac or PC. We are going to take a poem and shape it into the form of an image.

This is part two in a three part series. Please read before continuing.

Part I – How to create great type art
Part III – Sharing your type compositions

Here is the final image.

Click to Enlarge

Click to Enlarge

Adding your own text
We are going to work with the poem, “The Raven” by Edgar Allen Poe.

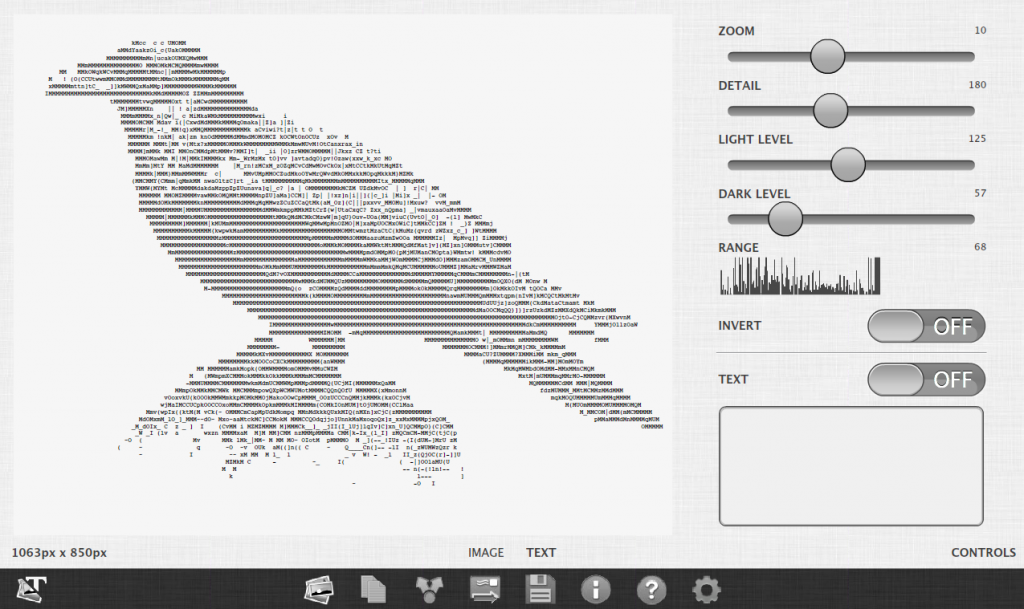
First import an image of a raven as shown below.

Import of Raven

Import of Raven

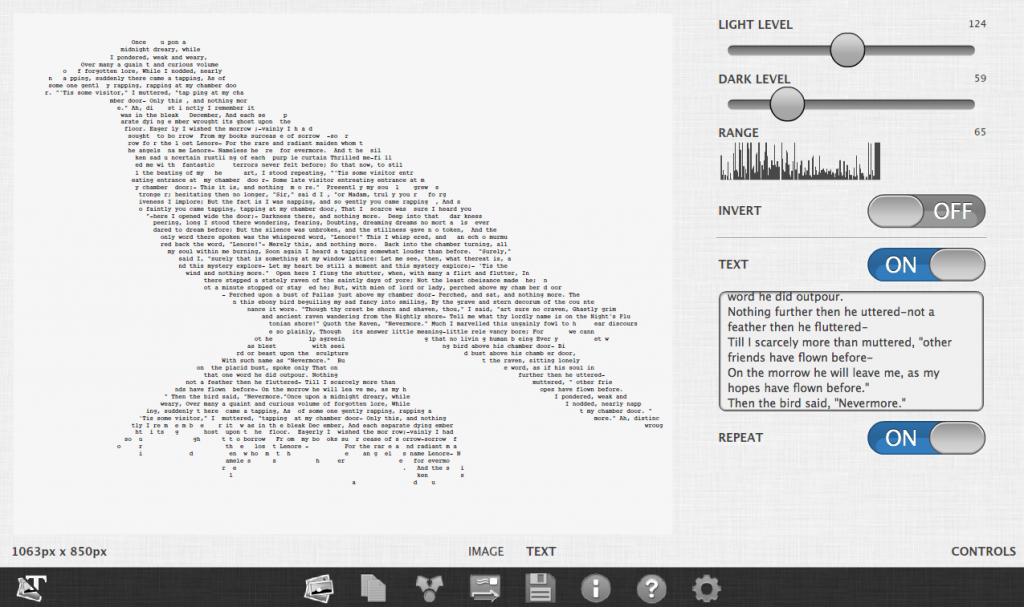
Next, type the text into the text area and set the text switch to “ON”. When you do this the text you’ve typed will be shown in the image.

You can see the text is now in the image.

Import of The Raven

Import of The Raven

You can also copy the text to the clipboard and paste it into the text area. The procedure for copying and pasting differs among the various operating systems and mobile devices. In this example I’ve copied the text from this page.

It may or may not take some time to render. It will render as you type. So if you have a lot of text to type you could turn off the text rendering until you are done typing and then turn it back on.

Note: In this example I’ve only copied the text from the first page (which is only half of the poem the last line being, “Then the bird said, ‘Nevermore'”.

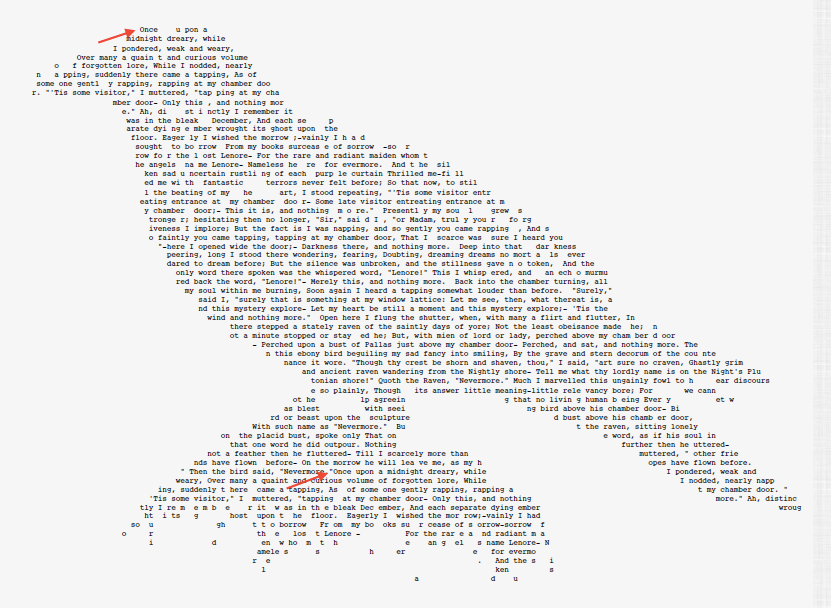
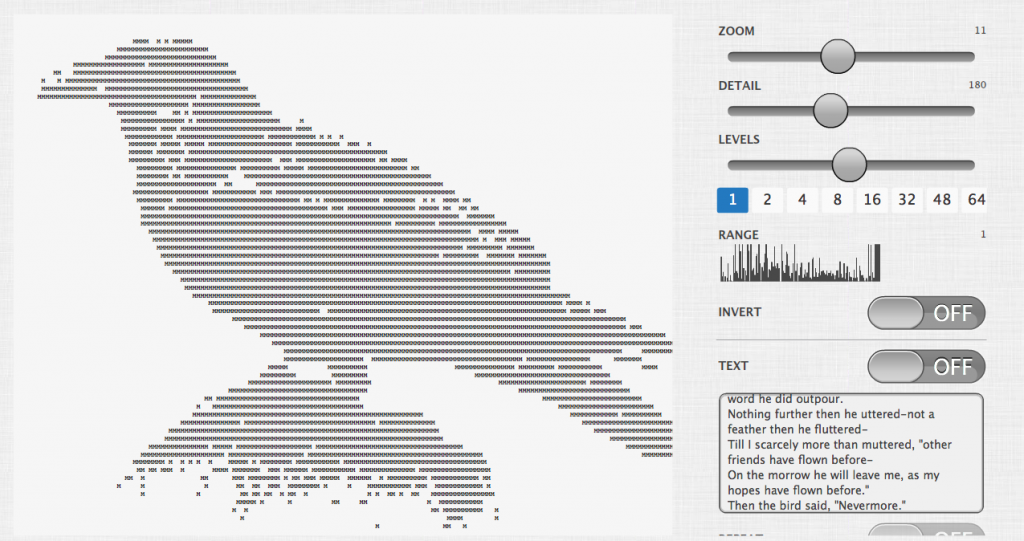
Notice the red markings in the next image. Click to enlarge.

Text Repeat

Text Repeat

These indicate the start of the poem and then the position the poem repeats. The reason the text repeats is because the Repeat switch is set to “ON”. This is on by default to help fill out the image. Be sure to add a space at the end of your text if Repeat is on. If you have a decent amount of text already or if you don’t want to repeat the text then you can set this option to “OFF”.

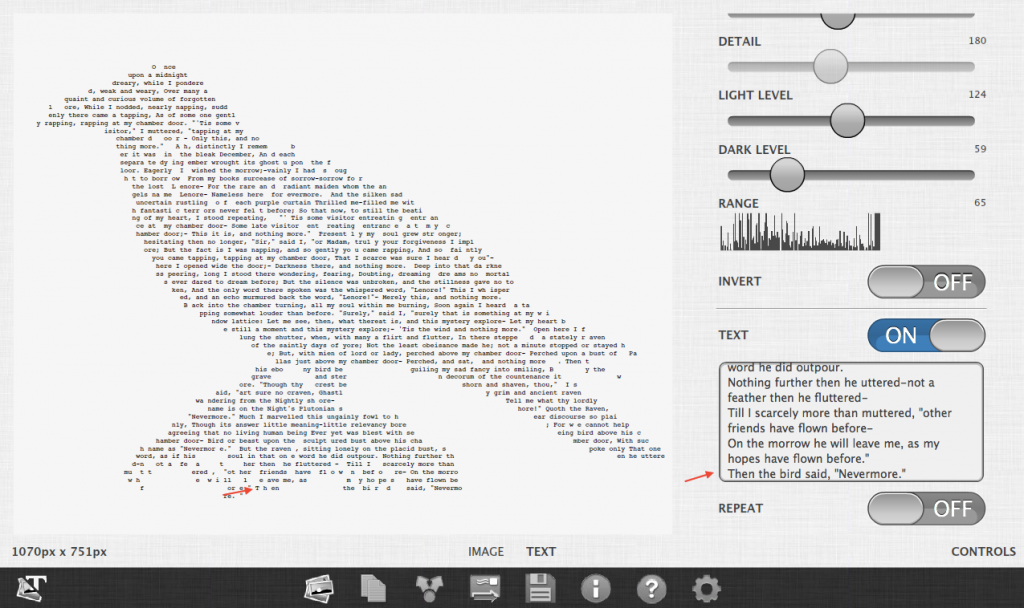
When you set Repeat to “OFF” the application automatically increases or decreases the detail value of the image until it matches the amount of text you’ve provided. Notice the last line of text entered in the text area matches the last line of text in the image.

Repeat off

Repeat is off

When Repeat is set to “OFF” and when you don’t have a lot of text it will be very small and indistinguishable. It will most likely look like nothing. The more text you have the more the image will fill out.

If there is a lot of text it can take some time to process. It is not known how long it will take but it will depend on the amount of text you’ve entered and the image.

Note: When you set Repeat to “OFF” the detail level slider will be disabled. This is because the detail level has to be auto calculated to fit the content.

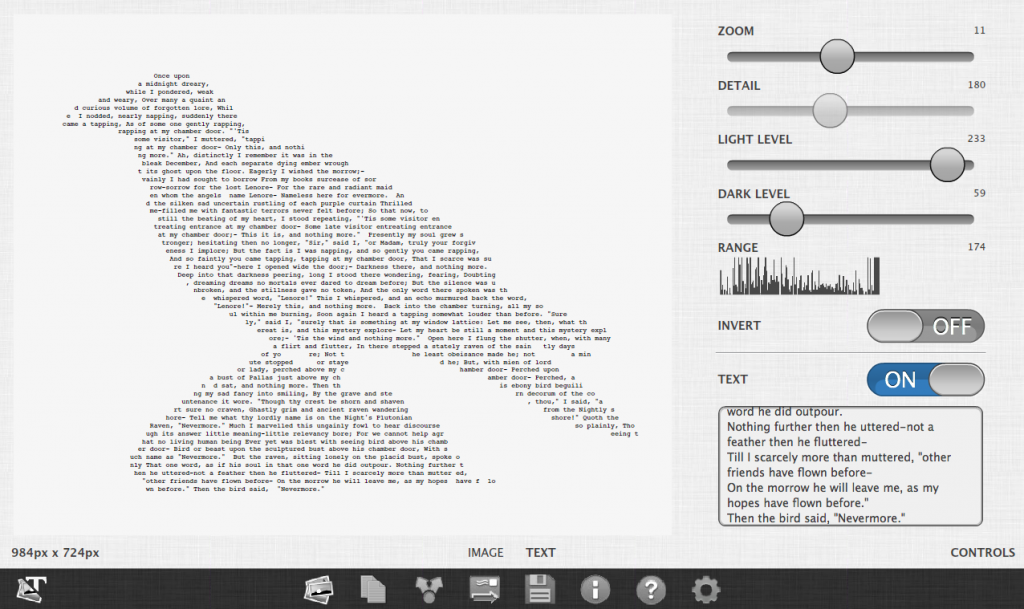
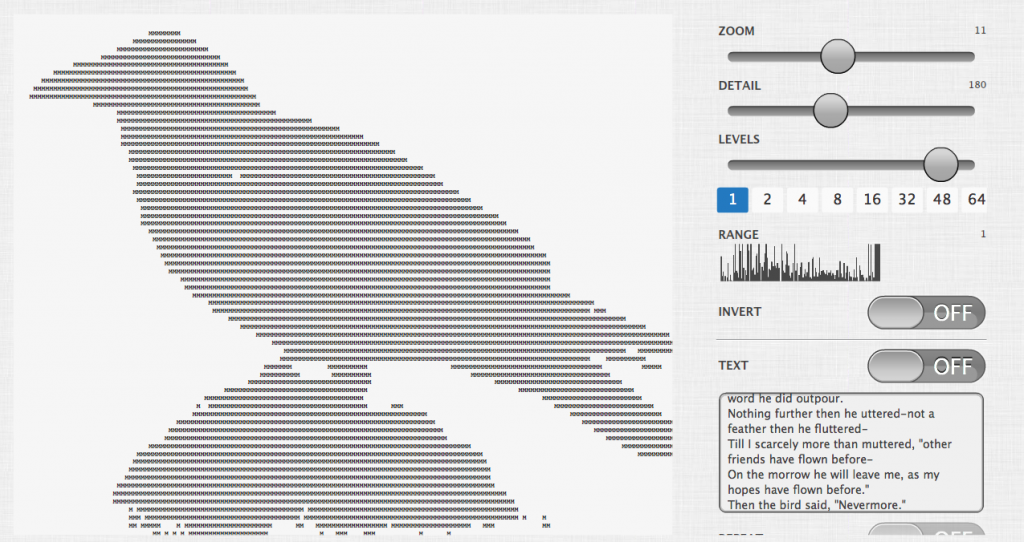
The image in the example so far is good but it’s not great. That’s because we are still treating it like an image with a gradient of colors. We can increase the quality of the image by increasing the brightness level to about 230. Now look at the image.

Adjusted image

Adjusted image

It may not be that apparent but you will see the difference soon.

What we did was go from a setting that shows a full range of light and dark characters to a setting that shows only a range of visible and non-visible characters. We do this because the text content you provide is either going to be a alpha numeric letter or blank (IE a space character).

In the images below, I’ve switched to using the Levels Controls so you can see the difference. Notice the Levels slider.

Before

Normal coverage

Normal coverage

After

Full coverage

Full coverage

Since we are not showing a gradient and we will eventually replace the image with our own text we increase the level setting to fill in the image.

Set the Text setting to “ON” to use your own text again. Now change the levels setting and you can see the difference. You typically will have to make adjustments to get the desired outcome.

Final image

Final

Final

PART III – How to export and share your type compositions

If you like this application please let others know about it.

© All images copyright their respective owners.


Sharing your Type Compositions

This tutorial will explain how to create great type compositions and text art using VeraType for Android or VeraType for Mac or PC. This is part three of a three part series. Please read the previous articles if you have not yet read them:

PART I – How to create great type art
PART II – How to convert text into an image

Sharing

You can share the image you created in a few ways. When you click the share icon it will give you the option to share the image, the HTML or the text.
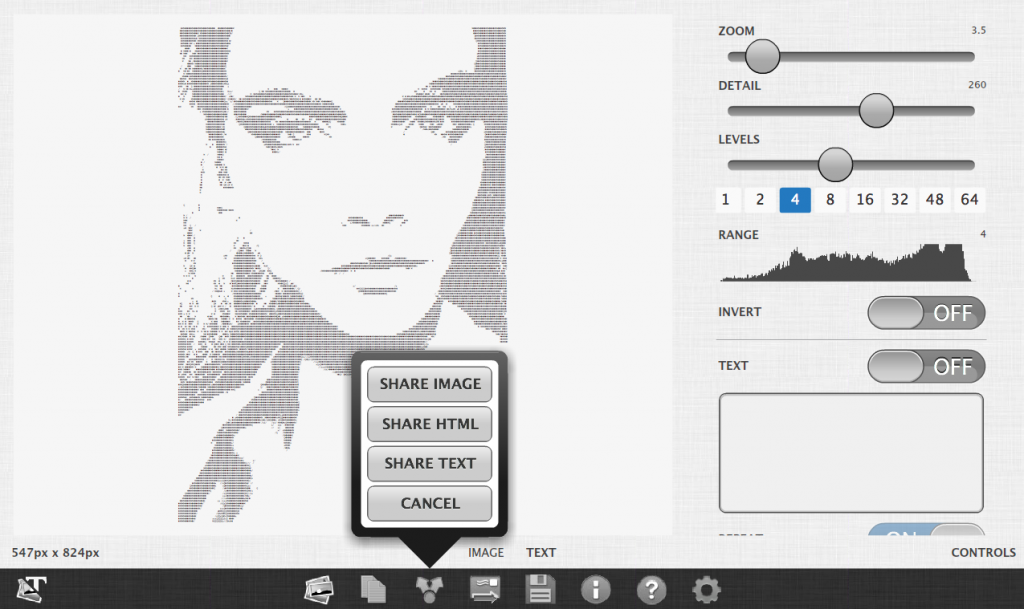
Figure 6. Share options

Share options

When sharing on a mobile device any social applications that can work with images will appear when you choose the “Share Image” option. When you choose, “Share HTML” any social applications that can work with HTML will appear and the same goes for the, “Share Text” option. This option is not available on the desktop version.

When working with HTML and text you’ll have to have an application that supports full HTML otherwise these formats will be displayed distorted. A browser is usually the most reliable application to accurately display the HTML that’s generated. When working with text a word processor or code editor is usually the most reliable way to accurately display the text that’s generated. In the case of the word processor, you’ll want to choose a fixed-width font.

Email

You can email the content you created. When you click the share icon it will give you the option to share the image, the HTML or the text. This option is not available on the desktop version.
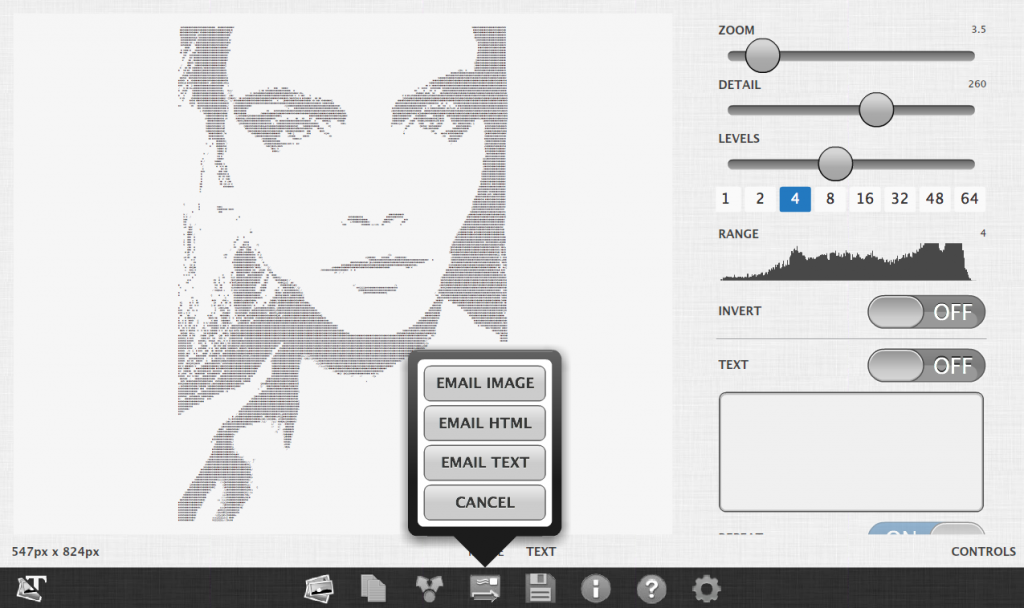
Figure 7. Email

Email

When you choose, “Share Image”, if you have your email account setup, the email application will open with the image added as an attachment.

When you choose, “Share HTML” or “Share Text”, if you have your email account setup, the email application will open with the HTML or text added as an attachment. Usually, the text or HTML will be distorted. As described in the sharing section, you’ll have to have a application that can accurately display that format.

Copy to Clipboard

You can copy the image you created to the clipboard and then paste it. When you click the copy icon it will give you the option to copy the image, copy the HTML or copy the text.
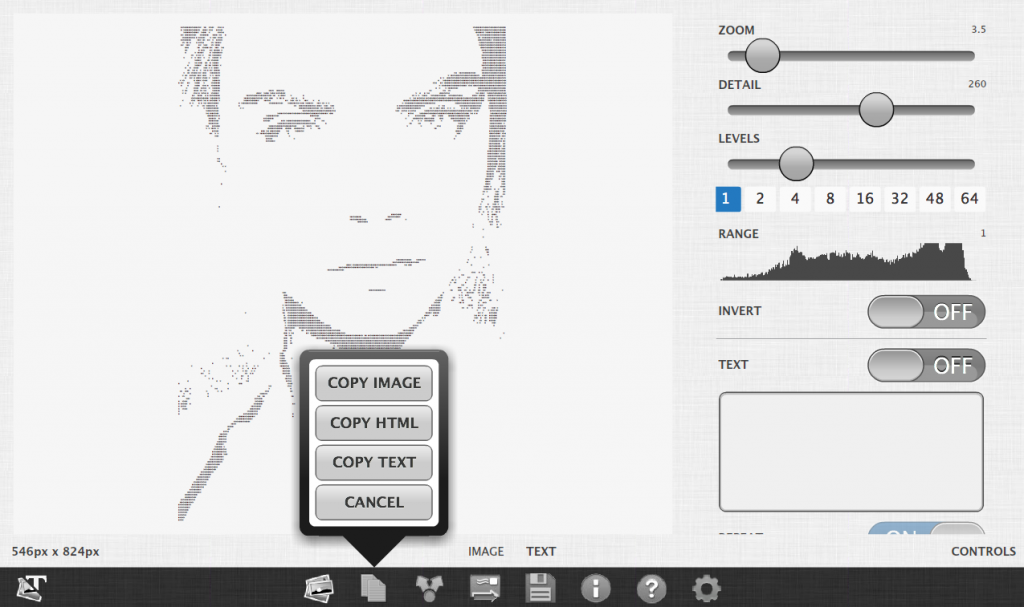
Copy to Clipboard

Copy to Clipboard

When you choose, “Copy Image”, the image will be copied to the clipboard. You can paste this image in applications that will accept an image pasted from the clipboard. For example, if you are working on desktop, you can paste the image into a program like Photoshop.

When you choose, “Copy HTML” or “Copy Text”, the HTML or text will be copied to the clipboard. As described in the sharing section, you’ll have to have an application that can accurately display that format.

When working with HTML you can paste that into an HTML editor and view it in a browser.

When working with text a word processor or code editor is usually the most reliable way to accurately display the text that’s generated. In the case of the word processor, you’ll want to choose a fixed-width font. Code editors usually display fonts fixed-width by default.

Export

You can also save the image to the desktop or camera roll. When you click the save icon it will give you the option to copy the image, copy the HTML or copy the text.
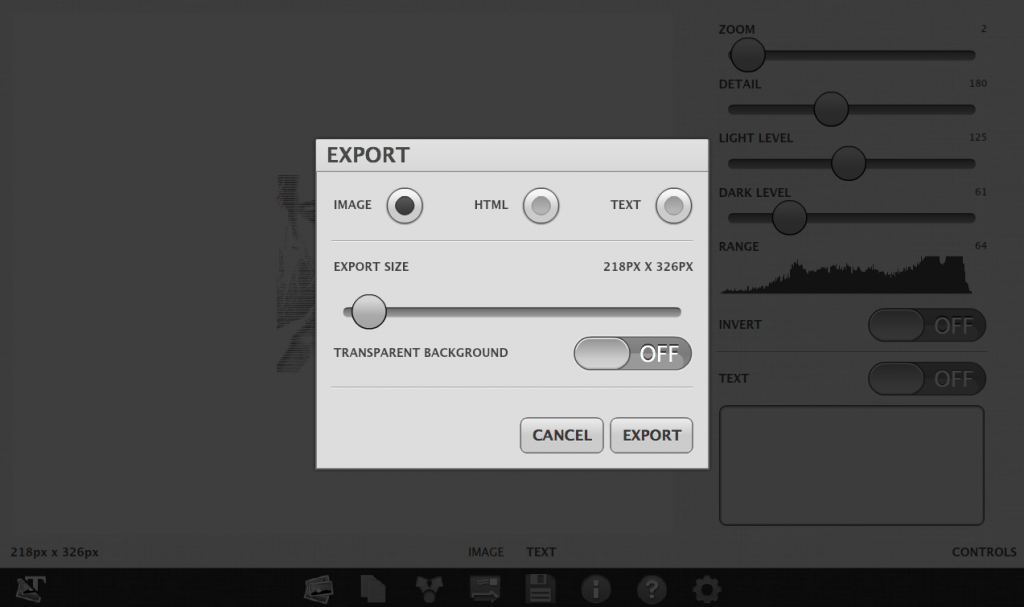
Export

Export

When you choose, “Image”, you will save an image to the desktop or on mobile to the camera roll. You can change the final image size by adjusting the slider. This adjusts the font size or zoom value. You can set the transparent background image switch to “ON” to remove the exported image background.

Note: On mobile devices the image may appear black. This is because the mobile phone’s photo gallery background is black and the text in the image you’ve exported is also black. Set the transparent setting to “OFF” to keep the background.

When you choose, “HTML” or “Text”, and then export you will save an HTML or text file to the mobile device’s documents directory. On mobile you may have to plug in the device into a computer to find or display the HTML or text. When running the application on the desktop a File Save As dialog will be shown that allows you to select a location to save the file to; by default the desktop directory.

If you like this application please let others know about it.

© All images copyright their respective owners.